Instructions - Create a new embroidery pattern
0) Load a new image. You can select any image or photo on your computer. This can be done directly on the home page of pixel-stitch.
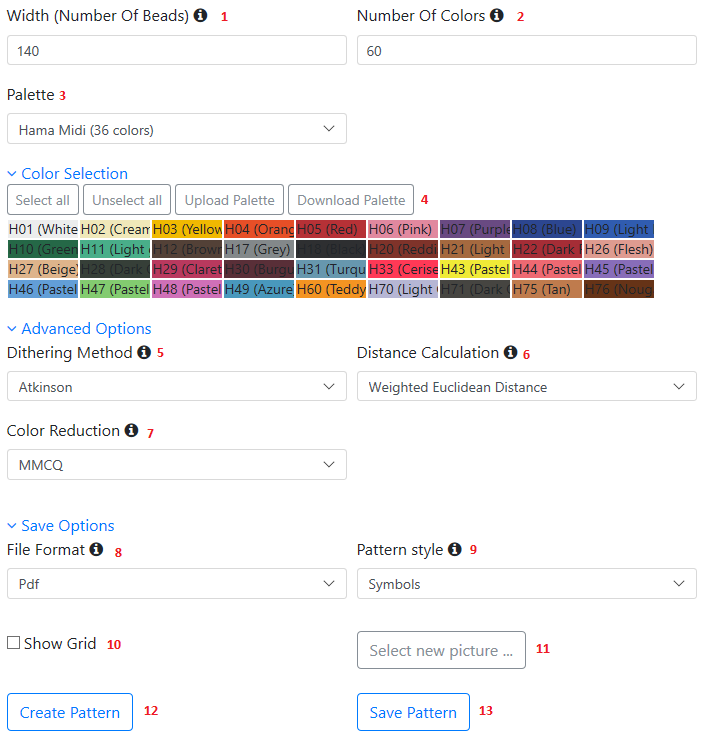
1) Select the number of stitches in width. Depending on the image size, the number of stitches is then automatically calculated in height.
The maximum width is limited to 500 stitches. If the number of stitches is high the calculation may take a few seconds depending on the system performance.
2) Select the number of colours that should be within the stitch pattern. During the computer calculation some of the embroidery colors are optimized so that the result contains fewer colors.
Try out different numbers of color and choose the best result while keeping the number of colors low.
3) Choose your embroidery thread. The type of thread determines the color palette that you will use in the pattern. You can currently choose between "all colors", "Anchor" and "DMC". Choosing DMC or Anchor the corresponding thread number will be displayed.
4) For the selected palette you can deselect individual colors by clicking on them. The deselected colors will not be used to create the pattern.
The button "Download Palette" can be used to save the existing palette. The deselected colors are not taken into account.
The button "Upload Palette" can be used to create a custom palette. You must select a file (for example .txt or .csv) that conforms to the following format:
One color is defined per line. A line consists of 2 columns. The 1st column indicates the color value as a Hex value. For example, #f0e8b9. The second line is the description of the color.
You can also select an existing palette as a template and then use it via "Download Palette".
Example content with 3 colors:
#eceded,H01 (White)
#f0e8b9,H02 (Cream)
#f0b901,H03 (Yellow)
5) Choose the dither algorithms. Dithering is a technique that replicates missing intermediate colors with available colors.
Color gradients are reproduced better and the result image is even more accurate.
Further information Dither
6) Choose the algorithms that calculates the similarity between the different colors. Try different variations and decide for the best result.
Further information Color Difference
7) Choose the algorithms that reduces the number of distinct colors used in an image. Try different variations and decide for the best result.
Further information Color Quantization
8) The file format in which the document is to be saved is determined. It is possible to save the pattern as a Pdf or as an Excel file.
9) It is specified how the pattern should look in the created file.
The following options are available for Pdf: Symbols, Letters/Numbers, Numbers, Symbols With Colored Boxes, Letters/Numbers With Colored Boxes, Numbers With Colored Boxes, Colored Boxes
The following options are available for Excel: Numbers With Colored Boxes, Colored Boxes
10) You can specify whether a grid is displayed in the preview image.
11) It is also possible to load a new image.
12) Now your are ready to create the stitch pattern! Press the button "Create Embroidery Pattern".
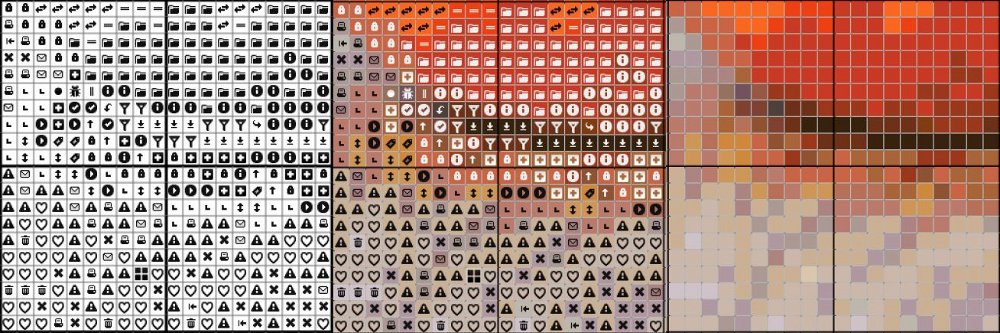
13) Once a stitch pattern has been created, a preview of the embroidery pattern appears. Below the preview you will also find the number of colors and an overview of the colors or yarns that are used in the stitch pattern. If you still want to optimize the result you can adjust settings and reload your stitch pattern again.
If you press the button "Save Embroidery Pattern" a document will be provided. In the document you will find all important information of the embroidery pattern: a schematic representation, informations about the used thread colors etc..
Now you are ready to start your new embroidery project! Enjoy it!